Nov 17, 2012

Stoic Wraith Shell - Wind and Light Rain Shirt


 9-7-13 Update:  Backcountry no longer sells their Stoic brand.  This product is discontinued.  I think I would replace it with a Montbell Tachyon.

11-17-12 Update: After several trips with my Wraith windshirt, I love it.  I bring it as my rain jacket when the forcast doesn't call for much rain.  Others have said it will keep you dry for an hour in rain.  I believe it.  I bring an umbrella that would help out in a driving rain.  My only complaint is the narrow sleeves that would make it hard to fit over my Nano Puff.  I still bring my Frogg Togg jacket if I need protection over my Nano Puff or expect an all day rain. 

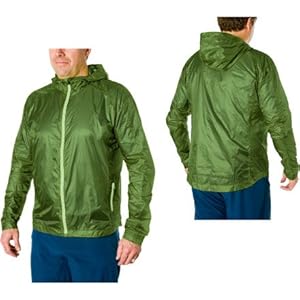
Just got in my new Stoic Wraith Windshirt from backcountry.com  Looks great.  They are eliminating a 2011 color for $27  at about 2.5 oz.  Actual weight is 73g or 2.55oz for the XL
www.backpacker.com/gear-zone-gear-review-stoic-wraith-rain-jacket/gear/15792

3-19 Update:  After a week on the AT with the Stoic windshirt, I have to say I love it.  Light, packs into the zipper pocket.  Only improvement is to waterproof the seams to use as a rain jacket as well. (I added a post on seam sealing sil-nylon.)  The sleeves are a little long, but no big deal

Specs:  www.backcountry.com/stoic-wraith-shell-mens
The weather-shunning Stoic Wraith Jacket is so small, lightweight, and easy to smuggle, your trail-running partners will think you conjured it out of thin air. Weighing in at a mere 2.5-ounces and small enough to fit in a pocket, the Wraith Jacket puts an end to soggy days on the trail.
  • DWR finish repels light moisture
  • 3-D Ergonomic fit moves with you, not against you
  • Small and light enough to fit in a pocket


Material:
 
nylon 
Fabric Waterproof Rating:
 
water-resistant 
Hood:
 
yes, full-time 
Fit:
 
athletic 
Pockets:
 
1 front zip 
Weight:
 
2.5 oz 
Recommended Use:
 
trail running, hiking, going ultralight 
Manufacturer Warranty:
 
lifetime 
Read more ...

Using GaiaGPS While Backpacking

I used GaiaGPS again on another backpacking trip.  On this test I turned on tracking, and tried to save waypoints at trail junctions and campsites.  I tried to record a voice memo to describe the point.  While reviewing these points at home, I discovered that you can save a picture as a waypoint.  This would be a better way to remind you of the point after the hike.  Cool feature.  I did post a feature request to add voice memo functionality to both waypoints and photos to help further document the point quickly while hiking.

GaiaGPS is a keeper!


Read more ...

Oct 26, 2012

Backpacking with an iPhone 5

This is a continuation of the iPhone 4 as a GPS post.

My goal is to eliminate all electronics except for my iPhone 5. This past weekend was my first "beta" test. The functionality I was replacing was:

1. Eliminate my Garmin eTrex. Functionality includes
A. Importing a saved track in .gpx format.
B. import topo maps around the track to be used offline.
C. Create waypoints at points of interest.
D. Save the track of the hike (if power permits)
E. 20 hrs battery life with 2 lithium AA.
F. Get sunrise sunset data
2. Eliminate my camera
A. Would like geotagging and accurate time stamping of photos
B. would like image stabilization.
C. Low light capability
D. Panorama photo capability
3. Eliminate separate phone
4. Eliminate music device.

New functionality I'd lIke to add includes:
- voice memos with time stamp to annotate waypoints
- offline blogging of trail journal
- kindle book reading capability.

So I ordered a iPhone 5 with AT&T service that uses a SIM card, as recommended by the Adventure Alan's excellent post on the subject that can be found here:http://www.adventurealan.com/iphone4gps.htm
The secret to battery life is to disable the all radios in the phone except for the GPS. The only way to disable the phone short of jail breaking, is to put a SIM password on the SIM. When you power down the phone, and restart it, it asks for your SIM password. If you click OK instead of Unlock, the phone is disabled, but the GPS still works. (If you wondered, airplane mode disables all radios AND gps)

Get Needed Apps
1. Gaia GPS - (guy-yah) Adventure Alan recommended this, and he was right. Best GPS app with offline cached capabilities and open source maps.
2. Maplets - this doesn't always help, but maplets has "specialized" maps done by parks and other government services. Can be helpful
3. Camera - native app - has panorama capability
4. Voice Memos - native app
5. Camera+ - has image stabilization, and other editing features.
6. Kindle - book reading app.
7. BlogPress - offline blogging app.

Prepping the phone for backcountry use
Upload track into Gaia GPS. Click the track in saved, click the share button, and click "show on map". Try both the USGS and Open Cycle Maps to see which will better suit needs. I found OCM often shows existing trails better, but is in metric elevations. Once you pick your map, go to saved, highlight track, share, and click "download maps for track". Now they are cached for offline use.  See http://www.gaiagps.com/wiki/downloadmapsalongtrack

Long push power button, and swipe to turn off phone. Power back up and click OK to keep SIM locked.

Turn all radios off, except location services: Bluetooth, Wifi, push notifications, etc. google on how to maximize phone battery for help on this.

In my last trip, I found I used 35% of the battery using the GPS and camera regularly. Be sure to background Gaia before sleeping the phone by hitting the home button.

In the next post, I will detail usage of Gaia GPS app, and each of the other recommended apps.

-=Dan=-
Read more ...

Oct 1, 2012

How I Pack My Backpack

I did an 8-day backpacking trip in Wyoming, and learned the limits of my Osprey Exos 58.  Yes, I got everything in it, but it was tight.  My packing procedure is as follows:
I put a trash compactor bag into the body of my pack.  My sleeping bag gets packed in a SilNylon Nano Dry bag (I have a post about this sack) and pushed to the bottom.  Next I drop in clothes I will not be wearing during the day.  These I keep in Ziplocs to organize and keep dry in my tarp.
Next I drop in my Nano Puff jacket and down jacket, and long underwear top.  I then goose neck the trash compactor bag and close with a velcro ziploc.  I put my down jacket along the outside so is can put my stove, mug, etc closer to my back.  They sit outside the bag to avoid food smell contamination.

On my Wyoming trip, we had to carry a bear can since we were above the tree line, so it goes in next.  Finally, trash and overflow items go in a bear bag I strapped in under the top flap/pocket of my pack.  8 days of food was more than the bear can could hold, so I started with 2 days of food in the bear bag.  We had trees for the first few days so no problem.  Later in the trip I put my smellables and trash bag in the bear bag and put it on boulders and shrubs that would keep it away from chipmunks, marmots, and other "mini-bears".

My tarp and stakes go in my front "Stuff it" pocket with my umbrella.  All the typically wet stuff is outside the pack.  The Exos also has vertical side pockets.  I put my rain gear in here since I can get it without opening my backpack.  The other vertical side pocket holds my fuel, water funnel, and two 2L Platypus jugs.

The rest of my miscellaneous stuff goes in the top pocket.   I try to not lot it get to heavy, but my 1st aid kit, foot kit, headlamp, etc goes there.

I'll take more pictures on my October camping trip and update this post.

Read more ...

Jun 25, 2012

Rain Gear and Hiking with an Umbrella

Backpacking in the rain is always a drudgery.  Hiking up a hill while a whitewater rush flows down the trail and over your boots. Yuck. So you try to carry enough gear to make rain bearable, but not weight you down on a sunny day.  A tough balancing act.  The combo I've come to is:

1. Put all my dry stuff in a trash compactor bag inside my pack.  I close it with a velcro tie-wrap.  Pack covers never seem to keep my pack dry, so now I just keep my dry gear dry (including sleeping bag).

2. I carry a Frogg Toggs ProAction jacket, as the "Tyvek" doesn't feel clammy and is lightweight (11oz) and $25.  Unfortunately, it doesn't  pack very small.  I may replace it with a DryDucks jacket when it wears out (only 6 oz)
http://www.backpackinglight.com/cgi-bin/backpackinglight/driducks_rain_gear.html

3. I carry an Eagle Creek Nimbus SL umbrella.  This was a  tough call since it weighs 5.5 oz.  However, I find that it is perfect for off and on showers, and around camp.  Great for getting in an out of the tent in the rain.

4. Red Ledge Thunderlight Rain Pants.  Only carry these if its going to be cold AND a possibility of rain.  I hate to be cold.  8.9oz and $30

5. Nitrile Gloves.  Rain gloves for less than $1 per pair.  Free from your local medical provider!

Hiking with an Umbrella


I got interested in hiking with an umbrella after reading an article on BackpackingLight on the subject.  Seemed like a good idea, but I didn't like the price.  However, I found a recommendation for the Eagle Creek Nimbus SL.  The product description lies, however.  It's 5.5oz not 3.5, but otherwise a good umbrella.  Some reviewers complained about the clip that holds it open, and I can see why.  Not very secure.  But if you are careful and don't force anything it works fine.  Is cost $15 and can be found here:
http://outlet.altrec.com/eagle-creek/nimbus-sl-travel-umbrella

A forum thread on umbrella use from BackpackingLight can be found here: http://www.backpackinglight.com/cgi-bin/backpackinglight/forums/thread_display.html?forum_thread_id=9799

Also, a good umbrella article from same source: https://www.backpackinglight.com/cgi-bin/backpackinglight/backpacking_and_hiking_with_an_umbrella

Read more ...

Jun 15, 2012

Make a Packing List @ GearGrams

I've been using a great website for maintaining my packing list.  It's an awesome flash-based website that allows printing lists, downloading spreadsheets, and reporting by category.  Awesome.  You have to give it a try...  www.geargrams.com.

You can also post your packing list.  Here's my list for my last warm weather AT hike: http://www.geargrams.com/list?id=6646
Read more ...

Jun 13, 2012

MontBell Alpine Light Down Jacket

I hiked the AT from Fontana Dam to Clingman's Dome last October.  Snowed the day before we hit the trail, and got down into the 30's each evening with stiff winds.  I brought the warmest lightweight jacket I own, my Patagonia Nano Puff Jacket.  I froze.  I love my Nano Puff, but it wasn't enough jacket.  I've fixed this problem.  This winter I bought the MontBell Alpine Light Down Jacket.

MontBell Alpine Light Down Jacket
When looking for an affordable down jacket, I narrowed my choices to either it or the Marmot Zeus.  Both are currently about $105 at backcountry.com.  I was able to find a slightly used MontBell Alpine Light at gearswap.com for some additional savings!  The owner said he has owned both and prefers the MontBell.  Several reviews I read said the same thing.  Only issue I saw in reviews was that the MontBell ran a little small, thus I chose the XL (I'm 6.0 x 205lb)

So I'm the owner of an almost new MontBell Alpine Light Jacket.  I will try it out this August when I hike the Wind River Range in Wyoming.  Will update with my findings.

Here's the specs:
Mont-Bell created the Alpine Light Down Jacket for backcountry explorers who want insulation and compressibility. The combination of ballistic nylon and premium 800-fill goose down means the Alpine Light is both warm and durable so you don't have to worry about wrecking this shell when you're really roughing it. You also won't have to worry about uneven insulation or down bunching thanks to cross-stitching.

Material:
 
ripstop nylon 
Insulation:
 
800-fill down 
Venting:
 
none 
Hood:
 
no 
Weight:
 
(medium) 11.5 oz 
Recommended Use:
 
cold weather, casual 
Manufacturer Warranty:
 
lifetime


Note: My size Extra-Large (XL) weighs 16.0 oz.

Read more ...

Sea to Summit SilNylon Nano Drybag


6/13/12 Update: I did a three day, 35mile AT hike using my new Ultra-sil Nano sleeping bag stuff sack.  Worked great!  It is very thin however, so I wouldn't want to stuff anything that isn't soft.  I'm happy with it, but don't know the long term ruggedness of it. We will see.  Will do an 80 mile hike in August which will give it a better test.

I was using a standard 20L Sea to Summit Silnylon Drybag for stuffing my REI Halo 25 down sleeping bag and Cocoon silk liner.   The sack was way to big.  Mice got into my bear bag, so I'm using the 20L for my bear bag and ordered a 13L Sea to Summit Ultra-Sil Nano Dry Sack for my sleeping bag.  www.seatosummit.com/products/display/170  This new sack is  1.0oz vs. 1.4oz for the standard Ultra-Sil Dry Sack.  Most of the weight is lost the the rolltop band and buckle.  A really nice looking sack!  I think the 13 liter will make my bag be longer and narrower which will fit my backpack better.

I use a Cocoon slik liner since I sleep in a tarp with no screens.  The silk allows me to lay outside my sleeping bag without worrying about bugs.  Also keeps my sleeping bag clean... to state of obvious.
http://www.rei.com/product/708744/cocoon-silk-mummy-liner
Read more ...

Jun 7, 2012

AT Hostel Review: Standing Bear Farms Hostel

Wow.  Very different place.  Convenient location just down the road the AT crosses leaving Davenport Gap heading east.

  • Very basic bunkhouse.  Some had foam rubber cushions without a vinyl cover... Funky smell.  
  • Pit toilet without TP.  No TP?  Really?
  • Honor system pay system. Very well equipped commissary.
  • Kitchen available, but no breakfast OR COFFEE in the morning.  No Coffee?
  • Didn't try the showers, but I understand they were the best part of the stay.
  • They have a washer and drier, but didn't try them.  
  • Curtis was not around, so missed the opportunity to interact with this colorful character.
OVERALL:
Stop for the supplies, camp on the trail.
Read more ...

Apr 20, 2012

New Spot II Satellite GPS Messenger

Spot GPS Messenger
Just got a new Spot GPS Messenger.  Got it for my son exploring China, but will use on my backpacking trips in the future.  BestBuy has these for $60.  www.bestbuy.com/site/SPOT

--- Snip --- The SPOT Satellite GPS Messenger gives you a line of communication when and where you want it, and emergency assistance when and where you need it. Stay connected regardless of cell coverage.

   SPOT Satellite Tracker Main Functions:


Check-in Using Spot
Check-in with SPOT - This feature allows you to let your friends and family know that all is OK with a pre-programmed message along with your GPS location is sent via email or SMS to up to 10 pre-determined contacts and your waypoint is stored in your SPOT account for later reference. Your stored waypoints can be easily integrated into a SPOT Shared Page or SPOT Adventure account. 

Help me SPOT - Ask for helpHelp! - In the event of a non-life threatening emergency, you can use this function to notify your personal contacts that you need assistance. [Optional $$] Additional SPOT Assist services can be purchased and programmed to your Help button as well. When activated with SPOT Assist, the Help button will notify professional services either on the land or water. SPOT has partnered with national service providers to offer non-life threatening assistance. 

Custom Message - This feature allows you to send your friends and family receive a pre-programmed, custom message along with your GPS location with a push of a button. 

911 SPOT with GEOS don't forget to buy insuranceSOS and 911 - Press and hold the SOS button to alert emergency responders of life-threatening events. The GEOS Emergency Response Center will work with public response agencies around the world, and call your emergency contacts to find out more about your situation and keep them informed of rescue progress. GEOS works with all rescue agencies from the Air Force Rescue Coordination Center and Coast Guard to local urban and rural 9-1-1 call centers. Optionally [$12/yr], GEOS will also dispatch private rescue agencies in those countries where public resources won't do. SOS sends a message and location update every 5 minutes until canceled. 


Track your Trip with SPOT Satellite Messenger[Optional $50/yr] SPOT Track Progress - This feature allows you to send and save your location and allow contacts to track your progress in near real time using Google Maps. With your SPOT account you have the ability to set up a SPOT Shared Page which allows you to show your SPOT GPS locations to others on a Google Map.


[Optional $$] Roadside Assistance - Using the SPOT help feature you can get roadside service 24/7  in the United States and Canada. Using your national roadside assistance provider the SPOT will pinpoint your location for the service provider to ensure quick service when you are stuck by the road. -- Snip --

Basic Service costs $99 for I'm OK, Custom message, Help and SOS.  Options: $49 for Tracking, which uploads your location every 10 minutes for 24 hours.  All info is available from a shared website.  You can see my site here: 
http://share.findmespot.com/shared/faces/viewspots.jsp?glId=0hrqqi2yppoug7SohQyH9WY2b6uXryKY5

Spot uses the Globalstar Simplex Data Service. Globalstar is a low Earth orbit satellite constellation for low-speed data communications, somewhat similar to the Iridium satellite constellation and Orbcomm satellite systems.
Read more ...

Packing a Backpack


While trying to figure out how to pack my backpack, I found this great blog post by Eric "The Black" Aborbon.  http://blackwoodspress.com/blog/9556/how-to-pack-a-backpack/

I can take NO credit for this great graphic!
Read more ...

Osprey EXOS 58 Backpack

Osprey Exos 58
I just got a new backpack.  It's an Osprey EXOS 58.  It weighs just 2.5 lbs!  My old pack weighted over 5.5 lbs.  While extremely light, it is much more versatile than my old one.    I had given up my pack top "lid" on my old pack to save weight.  I'm glad I get that feature back on my new pack.  It also has a pair of clips for hold your hiking sticks while hiking.
For more on this pack, see:
http://www.ospreypacks.com/en/product/superlight/exos_58

3-19 Update:  After a week on the AT with this pack, I absolutely love it.  All the pockets keep me organized.  The side mesh pockets allowed me to stash my Gatorade bottles while on the move and still hold my windshirt and/or trash I picked up on the trail.  The sleeping pad loops are a little short.  Just fits my RidgeRest.

Positives:
  • Ice Axe clips hold my hiking poles when traveling. 
  • Hiking pole Stow-and-Go works perfectly.  Great
    • Putting one pole in the Stow-and-Go and using it to prop my arm while holding my umbrella worked great.
  • Found that the lower Inside-out compression is best inside to not hinder putting my Gatorade bottle in the side mesh.
  • Easily bottle to and from the side mesh pockets without missing a stride.
  • Air Suspension back panel kept my back cool.
Negatives:
  • Vertical access zips is really a pocket, not access to main bag.  Can be difficult to get stuff in these when bag is packed.
  • Hip belt buckle seams a little small...  But working great so far. 
4-19-12 Update: Backpacker Magazine May 2012 scored the Osprey Exos 46 as most stable ultralight pack, and scored just below GoLite Jam 50. See http://www.backpacker.com/gear-review-osprey-exos-46-backpack/gear/16631

6-25-12 Update: Found a great review on backpackgeartest that describes the pack in detail:
http://www.backpackgeartest.org/reviews/Packs/Internal%20and%20External%20Framed%20Backpacks/Osprey%20Exos%2058%20Backpack/

Read more ...

Mar 20, 2012

Washing Clothes on the Trail

To wash clothes on the trail, get a 2 gallon zippered ziplock bag and label it “Wash”.  Every couple days follow these steps:
1. Place clothes into bag
2. Add water (cool or warm – not hot)
3. Add two drops of Campsuds or Dr. Bonner's
4. Massage bag for a few minutes or carry on backpack where it cannot leak on dry items.
5. Drain water by broadcasting away from camp area or into campfire ring.
6. Refill water in bag - shake to rinse suds from cloths
7. Add two drop of bleach to sanitize and agitate for several minutes.
7. Drain water into sump area
8. Hang out cloths to dry, or pin to outside of backpack
Read more ...

Seam Sealing Silnylon

Looking for info on seam sealing my new Stoic windshirt, I found this great article from seekoutside.com on the process:

Seam Sealing Instructions

Our tents and tarps need to be seam sealed to provide the best protection from the elements. Seam sealing is a simple process, and should take less than half an hour. Although you can seal seams without pitching the tarp or tent, it is easiest and cleanest  to pitch them and seam seal the tents and let them dry a bit. You need a couple hours of pretty good weather to let the sealer dry. It should be noted, that when finished, it is normal for the seam to feel tacky to the touch, but not be wet.
To perform this you will need:
  • A clear silicone based sealant e.g. a small tube of clear GE premium waterproof Silicone sealant available at hardware stores.
  • A 1/2″ foam brush
  • A few ounces of odorless mineral spirits
  • A clean container to mix the silicone sealant and mineral spirits
Here are the steps:
  • In a clean small metal or plastic container , put in some of the clear silicone sealant and add in some odorless mineral spirits.  I mix it to more of a room temperature buttery consistency.  With GE I use only a small amount of mineral spirits but with the others I need to add more.
  • Once you have the consistency, I find it easiest to dab some on the corner of the foam brush and spread on the seam. It is easiest to do this while you are inside the tent, since it’s easier to reach the whole seam. Lower seam portions may need to be done from the outside and you certainly won’t harm anything from doing the outside or both sides.
Read more ...

Mar 7, 2012

Backpacking Mac & Cheese

1 Box Kraft Mac & Cheese Thick and Creamy
2 1/4 Cu Water
1.5 Tbs Olive Oil
Tony Chachere's Creole Seasoning to taste.

Boil water, add noodles and boil 2 minutes or until flame goes out
Pour into quart freezer bag, in FBC koozie.  Soak for 15 minutes.
Stir in cheese, chicken if you have some, oil, and Tony's.

Read more ...

Mar 6, 2012

Georgia AT GPS Track and Waypoints

I've merged tracks and waypoints I've found for the Georgia section of the Appalachian Trail; Springer Mountain to Dick's Creek Gap.  I'll add the rest of Georgia waypoints soon.  Shelters and track are there already.  Points of Interest were gathered from Backpacker magazine.

In Garmin and GPX formats.
georgia-appalachian-trail.gpx
georgia-appalachian-trail.gdb
Read more ...

Feb 20, 2012

iPhone 4 as GPS

Credit: adventurealan.com
Found an awesome article on using an iPhone 4 as a GPS (and camera) for backpacking.
http://www.adventurealan.com/iphone4gps.htm
Read more ...

Feb 15, 2012

Tarptent

Credit: Henry Shires
For my tarptent, I modified Henry Shires' design.  I used tyvek housewrap, and made it with an integral ground tarp (folded the edge the is staked into the ground).

See the design here.  http://www.tarptent.com/projects/tarpdesign.html
I'll update this with my modifications soon.
Read more ...

Feb 13, 2012

My Packing List

I'm using a super website called GearGrams to record all my backpack supplies and weights. See http://www.geargrams.com/list?id=5824  Below is the overview for my current pack list.

You can setup your own gear list at the main geargrams.com site.

http://www.geargrams.com/list?id=5824 
Read more ...

Windscreen

I used Sgt. Rock's design for the windscreen: http://hikinghq.net/sgt_stove/wind_screen.html
This design uses a stove liner tray (like a big pie tin) for the material. Only change from his design is that I stapled the seam at the top and bottom so it wouldn't come apart. I just fold it up and stuff it in my pot for storage.
Read more ...

Wire Pot Stand


Again, I started with Scott Bryce's design from http://scottbryce.com/yaas_stove.  The legs are made from coat hangers.  I didn't want to try to find the aluminum tubing or 22 shells, so I used some stiff wire I found on the workbench and twisted it around the two coat hanger legs with pliers, and bent feet onto the ends of the wire. Except for the small 1/4" feet, the dimensions are the same as Scott's "Yet Another Pot Stand". I bent them a little smaller to fit inside my pot, a Backcountry 700ml pot similar to this: http://www.backcountry.com/backcountry-titanium-cookset-1100ml

It's important to maintain the vertical clearance from stove to  pot for optimum heating.
Read more ...

Feb 11, 2012

Alcohol Stove


After an exhaustive search of stove, I found a page called "yet another alcohol stove" by Scott Bryce. http://scottbryce.com/yaas_stove/index.html

The stove is super simple to build, doesn't require preheating, and can run on rubbing alcohol in a pinch. It DOES require a pot stand. I tried a non-pressurized design that allows the pan to sit in the stove, but it did not heat my small 700ml pan well since there was no flame in the center.

I used Scott's template, but used two "Fancy Feast" cat food cans. The are a pinch smaller, and have a flat bottom. The holes on the template don't line up exactly since this diameter is smaller, so punched the last two holes in both the upper and lower templates to evenly space the last two holes. Two holes don't alternate, but oh well.

Spend some time widening the bottom can. It didn't seem to expand as quickly as a coke can.
Read more ...